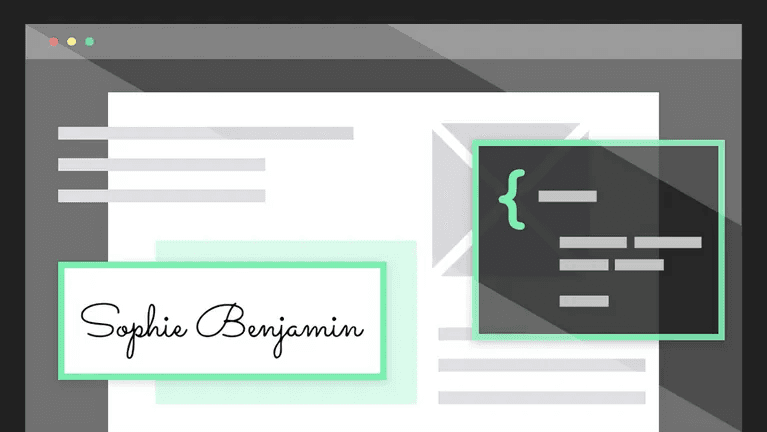
PDF processes are core to every business, but the step involving filling and e-signing can be complex. Our e-signature API removes that layer of complexity, while giving you full control over the process. In this blog post, we'll cover embedding e-signatures a React app. By the end, we will embed a screen that looks like this:
 The e-sign experience embedded in an iframe within your app
The scenario: Integrating embedded e-signatures
You have a fully functioning React application, but you're missing one thing in your app flow: a way to fill PDFs with data and gather e-signatures from your users.
Anvil's Etch e-sign API provides two ways of notifying users to sign: via email, or embedding e-signature in your application.
Let's focus on the embedded approach. Embedding the signing UI in your app provides your users with a consistent UX, they will stay within your application throughout the whole singing process. The signer will not be sent an email when it is their turn to sign. Instead, your react app will direct the user to sign through an iframe or modal.
To learn more about Etch embedded signing with email notifications, check out our blog post on adding e-signatures to your app in 3 steps.
Goal
For example, our example app is an HR platform, and one feature is to onboard new hires into a company. We require every new hire to sign two forms: an NDA and an IRS form W-4.
Our app flow will be as follows:
- On the first page (
/onboarding/start), the user will fill out a webform. - Our server will create a signature packet with the details submitted through the webform, then generate a link for embedded signing.
- On the second page (
/onboarding/sign/:signaturePacketEid), the user will sign the documents through an embedded signature frame. - The user will land on our third and last page (
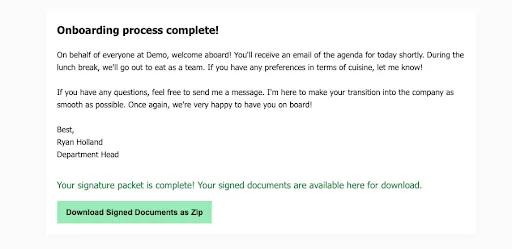
/onboarding/finish), which tells the user the onboarding process is complete.
We’ll be covering the following topics:
- Uploading a raw PDF and adding fields
- Using a PDF template
- Adding signers
- Pre-filling PDFs with data
- Requesting signatures for multiple PDFs
- Embedding the signing page into your React app
In this example we’ll be using React, Node.js, Express.js, the node-anvil client to make requests to Anvil, and Anvil's SignatureFrame React component to embed the signing page into our app. If you’re not using Node.js, rest assured because requests to Anvil from any platform will work the same.
Terminology
Signature packet- a packet of PDF documents that require signaturesPDF template(also known as acast) - a templatized PDF that holds the configuration for where data and signatures will be filled into
Setup: Preparing your React app for e-Signature embedding
-
Sign up for an Anvil account to retrieve your API key.
-
Proceed with authentication. Install the node-anvil client to your project.
yarn add @anvilco/anvil # or npm install @anvilco/anvil -
Import the Anvil client and create an instance in your server.
import Anvil from '@anvilco/anvil'
// The API key is found under your organization settings
const apiKey = '5AeDVVQ2ybDKqU8LktSVwFL63aLXgH2f'
const anvilClient = new Anvil({ apiKey })
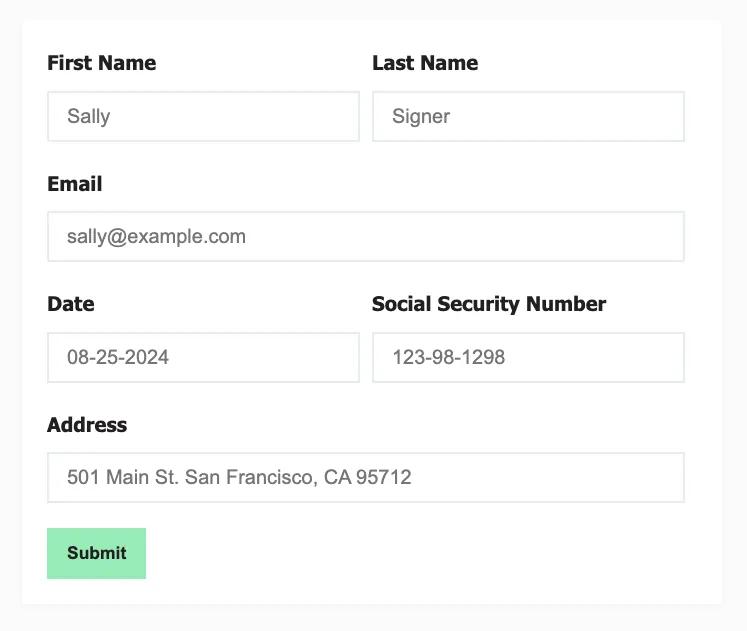
Building the first page new hire webform
First, let’s build a simple web form for new hires to input their information, which will later be used to create a signature packet.
Client side:
<form action="/api/packet/create" method="POST">
  <input name="firstName" type="text" />
  <input name="lastName" type="text" />
  <input name="email" type="email" />
  <input name="date" type="date" />
  <input name="ssn" type="text" />
  <input name="address" type="text" />
  <input type="submit" value="Submit" />
</form>
Defining and configuring your e-signature packet
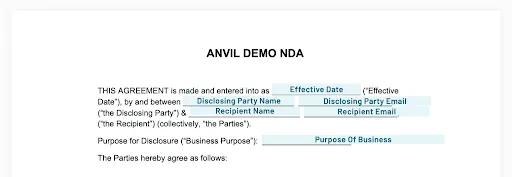
The NDA
This is the first out of two forms that the new hire will need to sign during the onboarding flow in our app. Since we don’t have a PDF template pre-built for this file, we’ll be uploading the PDF and specifying the fields for where data will be filled in the PDF.
Let’s initialize this file as a JavaScript object first. We’ll use this later to create our signature packet.
const uploadedNDA = {
  id: 'uploadedNDA',
  title: 'Company Onboarding NDA',
  file: anvilClient.prepareGraphQLFile('./static/onboardingNDA.pdf'),
  fields: [
    {
      id: 'employeeSignature',
      type: 'signature',
      rect: { x: 270, y: 374, height: 22, width: 142 },
      pageNum: 1,
    },
  ],
}
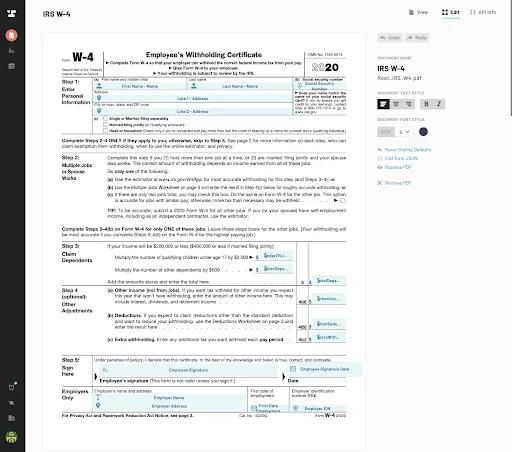
The IRS Form W-4
After signing the NDA, the new hire should see this form next on the signing page. Good news, we already have a PDF template for this form on our Anvil dashboard. You can import the W-4 into your own Anvil account from the Anvil form library. Using PDF templates is the simplest way to embed e-signature using use Etch e-sign, since the fields configuration has already been defined.
Like the NDA, we’ll initialize this PDF template as a JavaScript object. We’ll be using this later to create our signature packet.
const templateW4 = {
  id: 'templateW4',
  // castEid is also known as the 'PDF template ID'
  // found under the 'API Info' tab on the PDF template page
  castEid: 'nCpCqnkpRxjg1jNIUDZk',
}
All files
This array holds all the files our new hire will be signing.
const packetFiles = [uploadedNDA, templateW4]
Add signers
The new hire is our only signer. We want the signer to be signing within our app, so we’ll need signerType to be set to embedded. To ensure the new hire gets redirected to our confirmation page after signing, we’ll need redirectURL to be set to /onboarding/finish.
const packetSigners = [
  {
    id: 'signer1',
    // Important! This tells Anvil that our app will be
    // notifying the signer when it is their turn to sign
    signerType: 'embedded',
    // Important! This tells Anvil to redirect to this URL
    // after the signer has completed their signatures
    redirectURL: '/onboarding/finish',
    // fields left undefined to be filled using webform input
    name: undefined,
    email: undefined,
    fields: [
      {
        fileId: 'uploadedNDA',
        fieldId: 'employeeSignature',
      },
      {
        fileId: 'templateW4',
        fieldId: 'employeeSignature',
      },
    ],
  },
]
Prefill PDFs with data
const packetPrefillData = {
  uploadedNDA: {
    data: {
      // fields left undefined to be filled using webform input
      disclosingPartyName: undefined,
      disclosingPartyEmail: undefined,
      effectiveDate: undefined,
      recipientName: 'Demo Company Inc.',
      recipientEmail: 'hello@demo.com',
      purposeOfBusiness: 'DEMO!!',
    },
  },
  templateW4: {
    data: {
      // fields left undefined to be filled using webform input
      firstName: undefined,
      lastName: undefined,
      address: undefined,
      ssn: undefined,
    },
  },
}
Bringing our signature packet variables together
export const signaturePacketVariables = {
  files: packetFiles,
  signers: packetSigners,
  data: {
    payloads: {
      ...packetPrefillData,
    },
  },
}
Creating a route for our webform and generating a signature packet
When the new hire submits the webform on the first page, we need our server to use that information to create a signature packet using the node-anvil client.
We’ll achieve that by creating a route on our server which our first page webform will hit. This route retrieves the webform information from the request body, fills that data into the missing fields in our signature packet configuration defined in the previous section, and creates the signature packet. We can identify the signature packet created with the returned eid.
The user needs to land on the second page of our app flow after submitting the form, so we’ll add a res.redirect() call to /onboarding/sign/:signaturePacketEid at the end of the route function.
Server side:
import { signaturePacketVariables as variables } from '../variables'

router.post('/api/packet/create', async (req, res) => {
  // Extract the data submitted from the webform
  const { firstName, lastName, email, date, ssn, address } = req.body

  // Fill in signer details
  variables.signers[0].name = firstName + lastName
  variables.signers[0].email = email

  // Enter the prefill data for the NDA
  variables.data.payloads.uploadedNDA.data = {
    diclosingPartyName: firstName + lastName,
    diclosingPartyEmail: email,
    effectiveDate: date,
  }

  // Enter the prefill data for the W4
  variables.data.payloads.templateW4.data = {
    firstName,
    lastName,
    address,
    ssn,
  }

  // Create the signature packet on the server
  const { statusCode, data, errors } = await anvilClient.createEtchPacket({
    variables,
  })

  // Pass the signature packet EID to the client-side
  // for new hire to sign the packet
  const signaturePacketEid = data.data.createEtchPacket.eid
  const signingPageURL = `/onboarding/sign/${signaturePacketEid}`
  return res.redirect(signingPageURL)
})
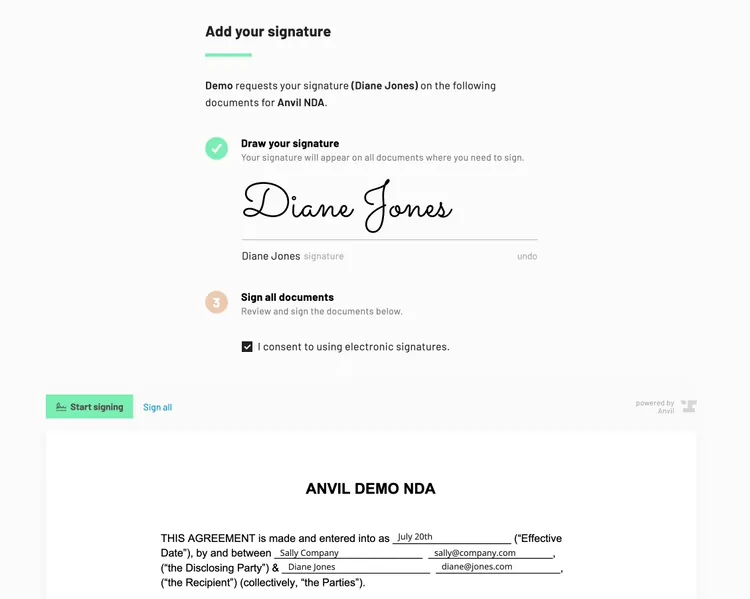
After the new hire submits the webform on the first page, a signature packet is generated on the server, and the new hire lands on the second page. The documents are ready to be signed.
Retrieving our signature packet details and generating a signing URL
To embed a signing frame into the /onboarding/sign/:eid page of our app, a signing URL is required, which we’ll generate using the node-anvil client.
We’ll do that upon rendering of the page.
this.state = { signURL: null }

async componentDidMount () {
  const response = await fetch('/api/packet/sign', {
    method: 'POST',
    headers: { 'Content-Type': 'application/json' },
    body: JSON.stringify({
      // clientUserId should be the signer’s ID in your system
      clientUserId: 5,
      signaturePacketEid: req.params.signaturePacketEid,
    }),
  })
  const responseText = await response.text()
  const { url } = JSON.parse(responseText)
  this.setState({ signURL: url })
}
Our server will fetch our signature packet details, and generate a signing URL for our new hire.
router.post('/api/packet/sign', async (req, res) => {
  const { signaturePacketEid, clientUserId } = req.body

  const { data } = await anvilClient.getEtchPacket({
    variables: { eid: signaturePacketEid },
  })

  // We only have 1 signer for this signature packet
  const signers = data.data.etchPacket.documentGroup.signers
  const signerEid = signers[0].eid

  // The signing URL generated here is used to
  // embed the signing page into our app
  const { url } = await anvilClient.generateEtchSignUrl({
    variables: { signerEid, clientUserId },
  })

  return res.jsonp({ url })
})
Note: Be sure to set clientUserId to the user ID in your system. This helps to provide user traceability from our system to yours. A key component is being able to show that an e-signature is associated with a given user, and that only that user can use their signature. Ensure that your app has measures in place to authenticate and authorize only this particular user to sign on their behalf.
Embedding the signature page
With the signing URL, we can proceed with embedding the signature page using the Anvil React component library.
We can choose between a frame component or modal component. For this example, we’ll use the AnvilEmbedFrame component.
Install the component.
yarn add @anvilco/anvil-embed-frame
# or
npm install @anvilco/anvil-embed-frame
Render the component onto our signing page.
import AnvilEmbedFrame from '@anvilco/react-signature-frame'
class SigningPage extends React.Component {
state = { signURL: null }
async componentDidMount() {
const response = await fetch('/api/packet/sign', {
method: 'POST',
headers: { 'Content-Type': 'application/json' },
body: JSON.stringify({
// clientUserId should be the signer’s ID in your system
clientUserId: 5,
signaturePacketEid: req.params.signaturePacketEid,
}),
})
const responseText = await response.text()
const { url } = JSON.parse(responseText)
this.setState({ signURL: url })
}
render() {
return (
<>
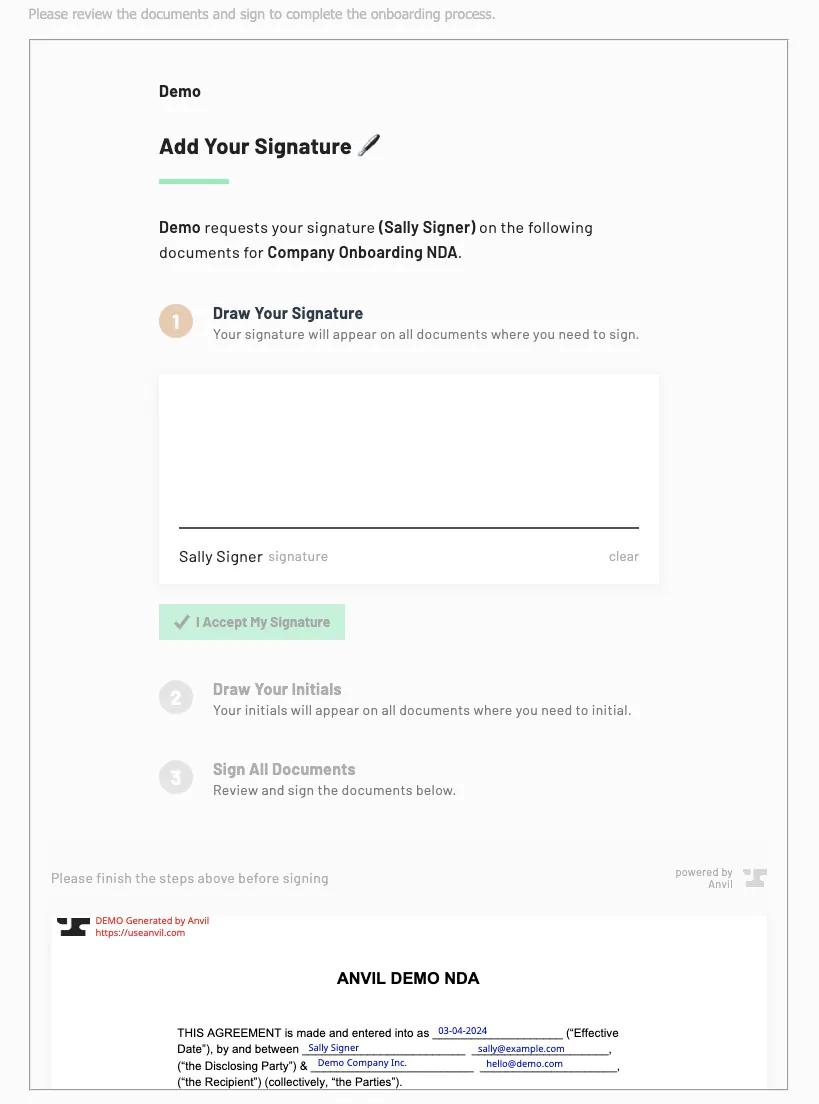
<p>
Please review the documents and sign to complete the onboarding
process.
</p>
<AnvilEmbedFrame
iframeURL={this.state.signURL}
onEvent={(eventObject) => console.log(eventObject)}
/>
</>
)
}
}
After signing, the onEvent function will be called with an event object. In the case of the user completing signing, the eventObject.action will be signerComplete indicating the signing has been finished. See the docs for a listing of all iframe events.
We specified signer one's redirectURL to /onboarding/finish when creating our signature packet, so the iframe will be routed to /onboarding/finish after signing.
Alternatively, you can handle the signerComplete event in the onEvent handler and close / unmount the iframe, redirect to another page, or take any other action you'd like.
Note: We used AnvilEmbedFrame for this example, but the process is the same for AnvilSignatureModal.
Get started integrating embedded e-signatures with Anvil
We’ve gone through all the steps for integrating Anvil’s embedded signing process into your React app, from generating a signature packet using the Anvil Node-client to embedding the signing page using the Anvil React component library.
Create an account to get started or book a demo to see Etch e-sign in action and explore how it can further benefit your application, today. Our team will guide you through advanced features and help you get started with a personalized solution!
Additional resources
- Try out our live example of Etch embedded signing
- Clone the example app repo to get a feel for using the E-signature API in your own Anvil account
- Take a look at our Etch E-sign API docs
- Handle requests and authentication with the Anvil Node-client
- Experiment with our API using the Anvil API Postman collection
Questions or comments? Contact us at developers@useanvil.com.